How to Install LED Track Light in 5 Simple Steps
LED track lighting has become one of the most flexible and popular lighting solutions for homes, retail spaces, galleries, offices, and commercial interiors. Its modular structure, adjustable heads, and clean architectural appearance make it ideal for both functional and accent lighting.
However, many installers and project owners underestimate the importance of proper installation. Incorrect wiring, poor mounting, or misunderstanding of track systems can lead to electrical issues, poor lighting performance, and even safety risks.
This guide explains how to install LED track lights correctly in five simple steps, along with the technical knowledge you need to avoid common mistakes and ensure long-term reliability.
Whether you are a contractor, electrician, designer, or distributor advising clients, this article provides a practical and professional installation reference.
Understanding LED Track Light Components Before Installation
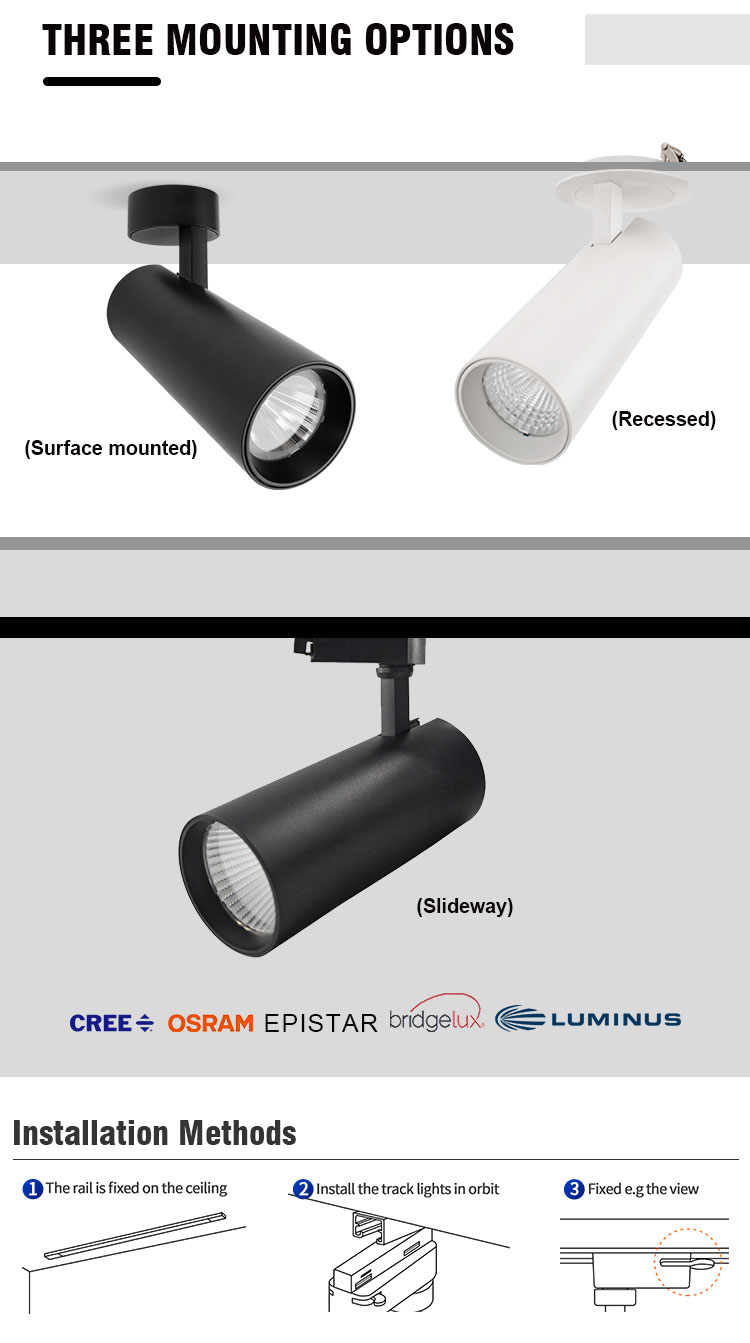
Before starting installation, it is important to understand the three main parts of a track lighting system:
-
Track Rail (Track Bar) – The electrified rail mounted on the ceiling or wall
-
Track Connector & Power Feed – Supplies electricity to the track
-
LED Track Light Heads – The adjustable luminaires mounted onto the rail
A proper understanding of how these components interact will make installation straightforward and safe.
Tools and Materials Required
Prepare the following tools before installation:
-
Drill and drill bits
-
Screwdriver
-
Voltage tester
-
Measuring tape
-
Pencil/marker
-
Wire stripper
-
Mounting screws and anchors
-
Ladder
-
Electrical tape
-
Track connectors (I, L, T, X types if needed)
Safety equipment:
-
Insulated gloves
-
Protective glasses
Step 1 – Plan the Layout and Turn Off Power
A. Design the Track Layout
First, determine:
-
Where the track will be installed
-
The direction of light beams
-
The number of track heads required
-
Distance from walls and objects
Track lights are commonly used for:
-
Highlighting artwork
-
Retail product displays
-
Kitchen counters
-
Office desks
-
Architectural accents
Measure and mark the ceiling or wall where the track rail will be fixed.
B. Turn Off the Power Supply
Before any electrical work:
-
Turn off the main power
-
Use a voltage tester to confirm no live current
This step is critical for safety.
Step 2 – Install the Track Rail Securely
A. Mark Drilling Points
Hold the track rail against the ceiling and mark the screw positions. Most tracks have pre-drilled mounting holes.
B. Drill and Insert Anchors
Drill holes and insert wall/ceiling anchors if mounting on plasterboard or concrete.
C. Fix the Track Rail
Secure the rail with screws. Ensure:
-
The rail is straight
-
It is tightly fixed without bending
-
There is no movement
A loose track rail can cause poor electrical contact and misalignment.
Step 3 – Connect the Power Feed to the Track
This is the most technical step.
A. Identify Wires
Typical wiring includes:
-
Live (L)
-
Neutral (N)
-
Ground (G)
B. Connect to the Track Power Terminal
Open the track power feed connector and connect:
-
Live wire to L terminal
-
Neutral wire to N terminal
-
Ground wire to grounding point
Tighten screws securely and close the cover.
C. Attach the Power Feed to the Track
Slide or clip the connector into the track rail according to the design (end feed or center feed).
Step 4 – Install Track Connectors (If Needed)
If your layout includes turns or extensions, use connectors:
| Connector Type | Use |
|---|---|
| I connector | Straight extension |
| L connector | 90° corner |
| T connector | Three-way junction |
| X connector | Four-way junction |
Install connectors firmly and ensure correct polarity alignment.
Step 5 – Mount the LED Track Light Heads
A. Insert the Adapter into the Track
Each track light has an adapter. Insert it into the track and twist/lock it into place.
B. Adjust the Direction
LED track heads are adjustable:
-
Tilt vertically
-
Rotate horizontally
Aim the lights at the desired objects or areas.
C. Turn On the Power and Test
Restore power and test each light:
-
Ensure stable illumination
-
Check for flicker
-
Verify correct aiming
Common Installation Mistakes to Avoid
❌ Not turning off the power
❌ Loose track rail installation
❌ Incorrect wire connections
❌ Mixing different track standards (2-wire, 3-wire, 4-wire)
❌ Forcing track heads into the rail incorrectly
❌ Poor layout planning causing uneven lighting
Understanding Track Types (Very Important)
Track systems are not universal. There are:
-
2-wire track – Basic on/off control
-
3-wire track – Two circuits, flexible control
-
4-wire (3-phase) track – Commercial and retail use
-
Magnetic track systems – Modern architectural design
Always ensure the track lights match the track type.
Ceiling Types and Installation Considerations
Concrete Ceiling
Requires drilling and anchors.
Gypsum/Plasterboard Ceiling
Use expansion anchors for stability.
Wooden Ceiling
Direct screws are sufficient.
Suspended Ceiling
Use support brackets above tiles.
Safety Tips for Long-Term Reliability
-
Do not overload the track with too many heads
-
Use certified drivers
-
Ensure proper ventilation
-
Keep wiring insulated
-
Follow manufacturer’s guidelines
Ideal Spacing Between Track Lights
For balanced lighting:
-
60–100 cm between track heads for general lighting
-
30–50 cm for accent lighting
-
Adjust based on beam angle and wattage
Benefits of Proper LED Track Light Installation
Correct installation ensures:
-
Stable electrical connection
-
Flicker-free performance
-
Longer lifespan
-
Better lighting effect
-
Easy maintenance
Applications of LED Track Lighting After Installation
-
Retail spotlighting
-
Art gallery lighting
-
Kitchen task lighting
-
Office illumination
-
Hotel corridors
-
Showrooms
-
Residential living rooms
Maintenance After Installation
LED track lights require minimal maintenance:
-
Clean lenses regularly
-
Check track alignment
-
Ensure adapters remain tight
-
Replace heads easily without rewiring
Why Professional Installation Matters in Commercial Projects
For retail stores, museums, and offices, correct installation:
-
Enhances visual merchandising
-
Improves lighting comfort
-
Prevents electrical issues
-
Meets safety standards
Upgrading and Expanding the Track System Later
One major advantage of track lighting is flexibility:
-
Add more heads anytime
-
Extend tracks using connectors
-
Change beam angles or wattage
-
Reposition lights without rewiring
Conclusion: Simple Steps, Professional Results
Installing LED track lights is straightforward when you follow the correct process. By planning the layout, securing the track rail, wiring properly, using connectors correctly, and mounting the track heads carefully, you can achieve professional lighting results in any space.
A properly installed track lighting system delivers:
-
Flexible lighting control
-
Modern aesthetics
-
Long lifespan
-
Safe operation
-
Superior lighting performance
Whether for residential or commercial applications, mastering these five simple steps ensures your LED track lighting works perfectly from day one and for years to come.