How to Install LED Bollard Light Step-by-Step (With Safety Tips)
Bollard lights are one of the most effective ways to enhance the safety, functionality, and aesthetics of outdoor spaces such as gardens, driveways, pathways, and patios. LED bollard lights, in particular, have become increasingly popular due to their energy efficiency, durability, and long service life. However, proper installation is crucial to ensure performance, longevity, and safety.
This guide walks you through the step-by-step process of installing LED bollard lights, while also providing practical safety tips to help avoid common mistakes. Whether you’re a homeowner, landscape designer, or contractor, this detailed walkthrough will ensure a smooth and secure installation.
Why Choose LED Bollard Lights?
Before diving into installation, let’s briefly understand why LED bollard lights are a preferred choice:
-
Energy Efficiency: LEDs consume significantly less power compared to halogen or CFL alternatives.
-
Long Lifespan: Quality bollard lights can last 30,000–50,000 hours, reducing replacement frequency.
-
Durability: With materials like stainless steel or aluminum and tempered glass, LED bollards withstand outdoor conditions.
-
Design Flexibility: Available in varying heights (30cm–120cm), beam angles (360° or asymmetric), and finishes.
-
Safety: Low-voltage versions are safe for DIY installation, especially in gardens and pathways.
Tools and Materials You Will Need
Before installation, gather the following tools and materials:
-
LED bollard lights (choose the right height, beam angle, and material for your project)
-
Mounting base (spike mount, anchor base, or ground sleeve depending on installation type)
-
Cables (suitable for low-voltage or high-voltage installation)
-
Transformer (for low-voltage systems)
-
Screwdriver set
-
Power drill with masonry bit (for concrete or stone surfaces)
-
Wire strippers and connectors
-
Measuring tape and spirit level
-
Protective gloves and goggles
-
Weatherproof junction box
-
Sealant or waterproof tape
Step-by-Step Installation Guide
Step 1: Plan the Layout
-
Mark the exact locations where you want to place the bollard lights.
-
Ensure consistent spacing for aesthetic uniformity (typically 2.5–4 meters apart for pathways).
-
Avoid placing bollards in areas where they might obstruct vehicles, foot traffic, or lawn equipment.
Safety Tip: Always check underground utilities before digging. Call local utility services if necessary.
Step 2: Prepare the Ground
-
For soil or grass areas, dig a hole deep enough for the bollard base (20–30 cm).
-
For paved areas, use a drill with a masonry bit to create anchor holes.
-
Ensure the ground is level for stable installation.
Safety Tip: Wear gloves when handling sharp tools or stones to prevent cuts.
Step 3: Run the Electrical Cable
-
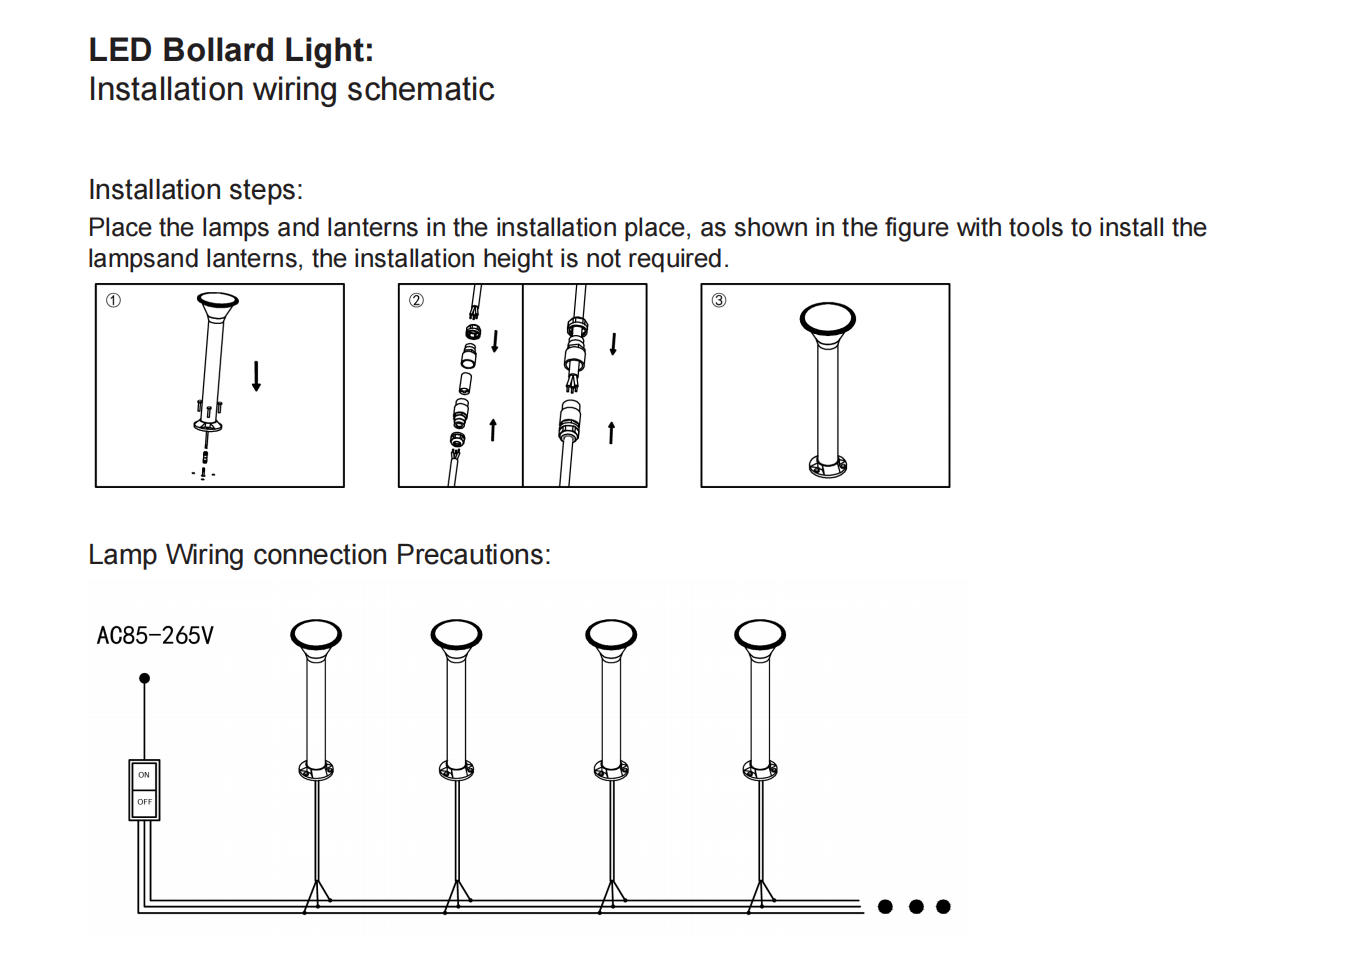
For low-voltage LED bollard lights (12V or 24V), connect the cable to a transformer.
-
For high-voltage LED bollard lights (110V or 220–240V), make sure the cable is routed through a conduit for protection.
-
Lay the cable along the marked route and bury it about 15–20 cm deep to protect it from garden tools or weather damage.
Safety Tip: Turn off the power at the circuit breaker before working with electricity.
Step 4: Install the Bollard Base
-
Depending on the design, you may have:
-
Ground spike mounts – Insert into the soil and compact tightly.
-
Anchor bolts – Fix into concrete or paving with expansion bolts.
-
Ground sleeves – Slide the bollard into pre-installed sleeves for easy replacement.
-
-
Make sure the bollard base is aligned vertically using a spirit level.
Step 5: Connect the Wires
-
Strip about 1 cm of insulation from the wires.
-
Use waterproof connectors to join the supply cable with the bollard wires.
-
Match polarity correctly:
-
Brown/Black = Live
-
Blue = Neutral
-
Green/Yellow = Ground (if applicable)
-
-
Seal all connections with weatherproof tape or inside a waterproof junction box.
Safety Tip: If unsure about wiring, hire a licensed electrician—especially for high-voltage installations.
Step 6: Mount the Bollard Light
-
Secure the bollard light body onto the base with screws or bolts.
-
Check alignment to ensure it’s straight and visually appealing.
-
Tighten all connections but avoid over-tightening, which can damage materials.
Step 7: Test the Lights
-
Restore power from the transformer (low-voltage) or breaker (high-voltage).
-
Test each bollard light individually.
-
Check brightness, beam spread, and uniformity along the pathway or patio.
Step 8: Final Touches
-
Backfill soil or cover the conduit for a neat finish.
-
Apply sealant around the base if exposed to rainwater.
-
Add landscaping elements like gravel, mulch, or decorative plants to blend the bollard with surroundings.
Common Mistakes to Avoid
-
Incorrect Spacing – Placing bollards too close may cause glare, while spacing them too far reduces effectiveness.
-
Wrong IP Rating – Always choose bollards with at least IP65 protection for outdoor use.
-
Poor Cable Protection – Exposed wires are prone to damage and unsafe. Always use conduits and waterproof boxes.
-
Using the Wrong Material – Avoid plastic for long-term use. Opt for stainless steel or aluminum for durability.
-
Neglecting Ground Leveling – Uneven installation leads to crooked bollards that ruin aesthetics.
Safety Tips for Installing LED Bollard Lights
-
Always turn off electricity before wiring.
-
Wear gloves and goggles during drilling or wiring.
-
Avoid installing lights in waterlogged areas without proper drainage.
-
Check manufacturer guidelines for installation height and recommended spacing.
-
For commercial projects, ensure compliance with local electrical codes and building standards.
Conclusion
Installing LED bollard lights is a practical and rewarding project that enhances both security and aesthetics of outdoor spaces. By following this step-by-step guide, you can ensure a professional-quality installation while maintaining safety at every stage.
Whether you’re highlighting a garden pathway, securing a driveway, or decorating a patio, choosing durable materials like stainless steel and tempered glass, ensuring proper wiring, and maintaining correct spacing will maximize the performance and lifespan of your LED bollard lights.
With the right planning, tools, and safety precautions, your LED bollard lights will provide years of efficient and reliable illumination.